Blogfermentation · recipes · Weston A. Price
Lacto-Fermentation at Home: How to Make Sauerkraut and Pickles
Home fermentation for beginners: how much salt to use, how to keep everything submerged, what's normal, when to throw a batch out, and why fermented vegetables are not the same as sealed canned preserves.
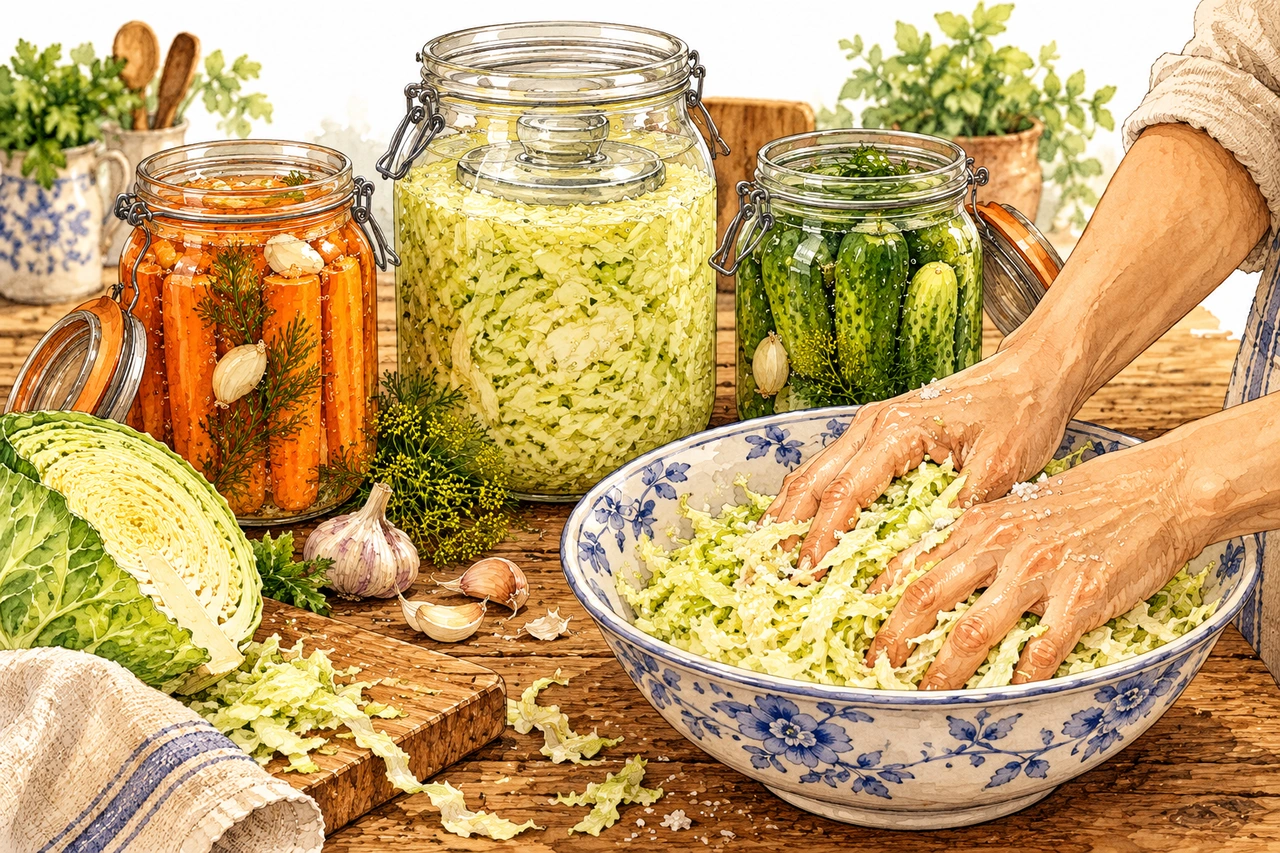
Start with sauerkraut. It takes only cabbage and salt, the cabbage releases the liquid it ferments in, and the result shows up in a few days. Weigh the cabbage, use 2% to 2.5% of that weight in salt, pound it until it releases its juices, pack everything into a glass jar so the cabbage stays covered by the liquid, and leave it in the coolest spot in the house. When it tastes as sour as you like, move it to the fridge. After sauerkraut come vegetables in brine, such as carrots and cucumbers. Dairy, like yogurt and kefir, follows a different logic and is left for the third step.
The safety of vegetable fermentation depends on three things you control: the right amount of salt, vegetables always under the liquid, and mild temperatures. It also depends on a distinction many people mix up: a ferment kept in the fridge is not the same thing as a sealed preserve kept in the pantry.
What happens in the jar
Lacto-fermentation is the work of lactic acid bacteria, the lactobacilli and their relatives, which live naturally on the surface of leaves and roots. They feed on the vegetable's sugars and produce lactic acid. The acid sours the vegetable, gives it its characteristic flavor and stops the growth of the bacteria that make food rot.
Salt plays a precise role at the start. It holds back the putrefying bacteria and favors the lactic ones, which tolerate salt better, until enough acid has formed to protect the jar. University of Illinois Extension sums it up this way: salt helps the fermenting bacteria grow in place of the ones that spoil food, the yeasts and the molds. Without oxygen, because the vegetable stays submerged, molds also have nowhere to grow.
It is a technique found all over the world: Central European sauerkraut, Korean kimchi, Japanese tsukemono, Eastern European pickles. In Brazil, the same family of techniques appears in puba (cassava soaked until it ferments, an Indigenous heritage) and in polvilho azedo (sour cassava starch).
First project: sauerkraut
Ingredients
- 1 kg of cabbage (green or red), weighed after removing the outer leaves and the core
- 20 to 25 g of salt without iodine or anti-caking agents (2% to 2.5% of the cabbage's weight)
- 1 teaspoon of caraway or juniper seeds (optional)
Instructions
- Wash your hands, the jar, the cutting board and the knife well with hot water and soap. Set aside one or two clean, whole outer leaves.
- Slice the cabbage very thin, about 2 to 3 mm.
- In a large bowl, mix the cabbage with the salt and let it rest for about 20 minutes.
- Squeeze and rub the cabbage with your hands, or pound it with a wooden pounder, for 5 to 10 minutes, until it releases plenty of liquid.
- Pack the cabbage into the wide-mouth glass jar a little at a time, pounding each layer until the liquid rises over the top.
- Cover with the whole leaf you set aside and put a weight on top: a smaller glass jar filled with water that fits inside the mouth of the large one, or a glass or ceramic fermentation weight. The cabbage must stay 2 to 3 cm below the liquid.
- Leave about 3 cm of space below the rim. Close with a fermentation lid (with an airlock valve) or with the lid just resting on top, not screwed on all the way.
- Leave it in a cool place, away from the sun. For the first few days, check once a day that the cabbage is still covered (if necessary, press it down with a clean spoon) and, if the lid is closed, open it briefly to release the gas.
- Start tasting from the fifth or sixth day, with a clean fork. When it is as sour as you like, close the jar and move it to the fridge.
If after a day the liquid does not cover the cabbage, top it up with a 2% brine (20 g of salt per liter of filtered water).
Why weigh the salt. Spoon measures vary a lot with the type of salt: a spoonful of coarse salt weighs much less than one of fine salt. The reference recipe from the American National Center for Home Food Preservation, the NCHFP, uses 3 tablespoons of canning salt for every 5 pounds of cabbage, which is close to 2.4% of the weight. With too little salt, the result suffers: Oregon State University Extension links soft sauerkraut to salt below 1.7%, and slimy sauerkraut, which should be discarded, to too little salt and excessive heat. Soft sauerkraut is still safe if the smell and taste are sour and clean; slimy sauerkraut is not. A kitchen scale settles this once and for all.
Temperature and the Brazilian climate. The NCHFP recommends fermenting sauerkraut between 21 °C and 24 °C, when it is ready in 3 to 4 weeks; below 16 °C it may not ferment, and above 24 °C it tends to soften. Illinois Extension adds that, with too much heat, the bacteria that spoil food can take over. In a Brazilian kitchen in summer, at 27 °C or more, sauerkraut turns sour much faster. What to do:
- choose the coolest corner of the house, away from the stove and the sunny window;
- start tasting earlier, from the third or fourth day;
- move it to the fridge as soon as it is sour, even if that is before the time given in recipes from cold climates;
- in the hottest months, prefer smaller batches, a single jar.
Many people ferment for weeks and store for months; a younger sauerkraut, of one week, is crunchier and milder. Both ways work, as long as the acidity has already formed before it goes into the fridge. The article on sauerkraut tells the story of fermented cabbage and its variations, and the sauerkraut recipe from 181 Receitas Ancestrais gives the complete step-by-step, with seasoning variations.
Second project: vegetables in brine
Once you've made your first sauerkraut, chunks of vegetables are the natural next step. The difference is that they don't release enough liquid on their own, so they need a ready-made brine.
The concentration depends on the size of the pieces. Illinois Extension recommends a 5% brine for whole and chunked vegetables and allows 3% only for shredded vegetables, always with the salt weighed. In grams:
- 5% brine: 50 g of salt per liter of water. For carrot sticks, green beans, cauliflower florets, sliced radishes and whole cucumbers.
- 3% brine: 30 g of salt per liter of water. Only for shredded vegetables, such as grated carrot or beet, which stay well covered and ferment evenly.
The method is the same as for sauerkraut: well-washed vegetables packed tightly into the jar, garlic, bay leaf, dill or chili to taste, brine to cover with room to spare, a weight on top, a lid with a valve or simply resting on top, and a cool spot. Carrot sticks are usually good within a few days in warm weather; whole cucumbers take longer. Grape or oak leaves at the bottom of the jar help cucumbers stay crunchy, an old trick that appears in the book's cucumber pickles recipe.
Use filtered water and salt without additives. The NCHFP notes that iodized salt can darken pickles and that anti-caking agents leave a white deposit in the jar.
Once vegetables are part of your routine, kimchi is the next project: salted napa cabbage, garlic, ginger, chili and radish, a ferment with more ingredients and more flavor. In Korea, making large batches before winter even has its own name, gimjang.
Leave fermented fruit for later. Fruit is high in sugar, attracts yeasts, can produce alcohol and gets out of control more easily than vegetables.
Third project: yogurt, coalhada and kefir
Fermented dairy is lacto-fermentation too, but the process is different. Instead of salt and weeks, you add a live culture to the milk (a little ready-made yogurt or kefir grains), keep the mixture warm or at room temperature, and within a few hours or a day the milk thickens and turns tangy. Then it goes into the fridge.
The three free recipes from the book belong to exactly this family and are complete, with step-by-step instructions: plain yogurt, milk kefir and natural coalhada (a traditional Brazilian soured milk, similar to a thick, tangy yogurt). To start, use pasteurized whole milk, which gives a predictable result. The golden rule is cleanliness: a clean jar, spoon and hands, and milk that is within its use-by date.
Fermented is not the same as sealed preserves
Botulism is a serious poisoning caused by the toxin of the bacterium Clostridium botulinum. The World Health Organization explains that this bacterium grows in low-oxygen environments and does not grow in acidic conditions, with a pH below 4.6, and that home-canned, preserved or improperly fermented foods are a common source of the disease. Brazil's Ministry of Health lists among the sources in the country homemade vegetable preserves, such as palmito (heart of palm), pickles and pequi (a native Brazilian fruit), and meats preserved at home.
So the question is: what separates a safe sauerkraut from a dangerous preserve? Acidity. In a well-made lacto-fermentation, the right amount of salt favors the lactic acid bacteria, which acidify the jar in the first few days. The risk appears when that acidification fails or never happens:
- A ferment that didn't turn sour: too little salt, vegetables sticking out of the liquid, too cold. If after a week there are no bubbles and no sour taste, throw it out and start over.
- Low-acid vegetables preserved in a closed jar, outside the fridge: palmito, pequi, cooked vegetables in a jar without a tested process. This is not fermentation, and it is the classic risk for botulism.
- Garlic or herbs in oil: the oil cuts them off from the air, and garlic is not acidic. The CDC, the United States public health agency, advises keeping homemade oils with garlic or herbs in the fridge and discarding them after 4 days.
- Fermented fish and meat: these are techniques of a different level of complexity. Leave them out of your first projects.
Two practical rules close the subject. First: once fermented, the jar goes in the fridge, as Illinois Extension advises. Don't seal a ferment and store it in the pantry as if it were a store-bought preserve: to store it at room temperature you would need to process it in a water bath following a tested protocol, which is a different technique. Second: smell is not a safety test. The CDC is direct: you cannot see, smell or taste the botulism toxin. A ferment that smells rotten should be thrown out, but one that smells fine is not automatically safe if the process failed.
For those who like to double-check, an inexpensive pH strip removes the doubt: the University of California, Davis recommends checking from time to time that the pH does not rise above 4.6.
Normal or toss
The troubleshooting guide from UC Davis, the Illinois and Oregon extension services and the Brazilian Ministry of Health's botulism page do not say exactly the same thing. Where they differ, we go with the more conservative guidance.
Normal:
- bubbles and liquid rising in the first few days, a sign that fermentation has started;
- cloudy brine and a white sediment at the bottom;
- a clean, sour, pickle-like smell;
- a swollen jar during active fermentation, because of carbon dioxide: open it to release the gas or use a lid with a valve;
- a thin, smooth, white film on the surface, with no fuzz: it is a common yeast called kahm, which the Illinois Extension considers safe. Remove it with a clean spoon and check that the vegetables are still covered.
Pay attention:
- soft sauerkraut that still smells and tastes clean and sour: a sign of too little salt or too much heat, and of lower quality; adjust your next batch;
- a pinkish color: it may come from the pigment in red cabbage or from yeasts caused by poorly distributed salt. If it comes with a slimy texture, throw it out.
Throw out the whole jar:
- fuzzy mold of any color, or green, blue, black or brown spots. Some extension services allow removing small spots, but UC Davis treats mold as a sign of failed fermentation, and that is the rule we follow at home;
- a slimy or gooey texture;
- a rotten smell, different from sour;
- a ferment that never turned sour;
- once it is done and stored in the fridge: a swollen lid, a cloudy glass jar, or any change in smell or appearance. For preserves, the Ministry of Health says not to consume them when there is a swollen can, a cloudy jar, damaged packaging or a change in smell and appearance; the same caution applies here.
When in doubt, throw it out. That rule comes from the Illinois Extension itself, and a cabbage costs less than the risk.
What you need
- Kitchen scale. It is the most important piece of equipment, because of the salt.
- Wide-mouth glass jars, 1 liter to start with. For large batches, proper ceramic crocks.
- A weight that fits inside the mouth of the jar: a smaller glass jar filled with water or a fermentation stone.
- A lid with a valve, optional, or the discipline of opening the jar every day during the first week.
- Wooden pounder, optional: clean hands will do the job.
Avoid copper, brass or zinc utensils in contact with the brine: the NCHFP says not to eat pickles darkened by these metals. Stainless steel, glass, glazed ceramic and wood are fine.
The Nu&Cru curated selection brings together small Brazilian brands chosen for their ingredients, craft and origin, including makers of glass jars and ready-made ferments. It has not opened to the public yet: on the page you can join the waiting list.
Who needs extra care
Fermented foods contain salt and live bacteria. Pregnant women, people with a weakened immune system or in treatment that affects immunity, and anyone who needs to control their sodium intake should talk to the health professional who follows their care before making fermented foods a habit. For babies and young children, the right timing and amount depend on the stage and on the guidance of whoever supports the family; we have not found an official minimum age for homemade fermented foods.
Why ferment, anyway
The first reason is preservation. Before refrigerators, a jar of sour cabbage was what guaranteed vegetables in winter. The second is flavor: fermented foods add acidity, crunch and depth to a plate of beans, a fatty cut of meat, a sandwich. As a condiment, in small amounts alongside the meal, it does the job it has always done.
Sally Fallon and Mary Enig, in the book Nourishing Traditions, which the first version of this text was based on, argue that fermentation makes vegetables easier to digest and more nutritious. That is the view of the authors and of the Weston A. Price Foundation. In research, the data in people are still limited. A Stanford University trial published in 2021 followed 36 healthy adults divided into two groups and found that a diet rich in fermented foods increased gut microbiota diversity and reduced markers of inflammation. It is a small study that does not measure disease or compare homemade ferments, but it points in an interesting direction.
Two details help explain the difference on the supermarket shelf. Pickles made with vinegar are not fermented: the acid comes ready-made. And a pasteurized ferment, sold outside the refrigerator, no longer has live bacteria: the heat that makes it shelf-stable also kills them.
The first jar
Buy a cabbage and a kitchen scale, if you don't have one yet, and make a jar of sauerkraut this weekend. Write down the date, the weight of the cabbage, the salt and the temperature of your kitchen. By the second jar, you will already know how to adjust.
A jar of fermented food in the fridge also becomes a base for other meals, along with broths and sauces. The article on base cooking for the week shows how to combine these preparations with safe storage times.
Once sauerkraut has a permanent place in your fridge, 181 Receitas Ancestrais opens the way to your next jars: it has an entire category of fermented fruits and vegetables, with sauerkraut, kimchi, cucumber pickles, jardineira (mixed vegetable pickles), fermented chili pepper and puba (fermented cassava), another of fermented dairy, and fermented sauces such as mustard, ketchup and vinagrete (a Brazilian tomato and onion salsa). Each recipe comes with step-by-step instructions and indicates the recipes it is used in afterward.
Part of this text was based on an article by Sally Fallon and Mary G. Enig published by the Weston A. Price Foundation ("Lacto-Fermentation").
As informações têm caráter educativo e não substituem avaliação individual de profissional de saúde habilitado.